This article explains how to install Code::Blocks and the SDL2 library on Windows.
I hope this would not be too difficult to adapt it on other systems.
I chose Code::Blocks because it is a popular IDE. But if you prefer another one, Code::Blocks projects are simple
xml files that are easy to understand. Anyways the only important things to add to your project are the source files
and a few libraries files for the linker.
The SDL is a very lightweight library that allows you to use advanced features like OpenGL on multiple platforms.
I will mainly use it for little 2D programs at the beginning but eventually I could do some 3D in the future.
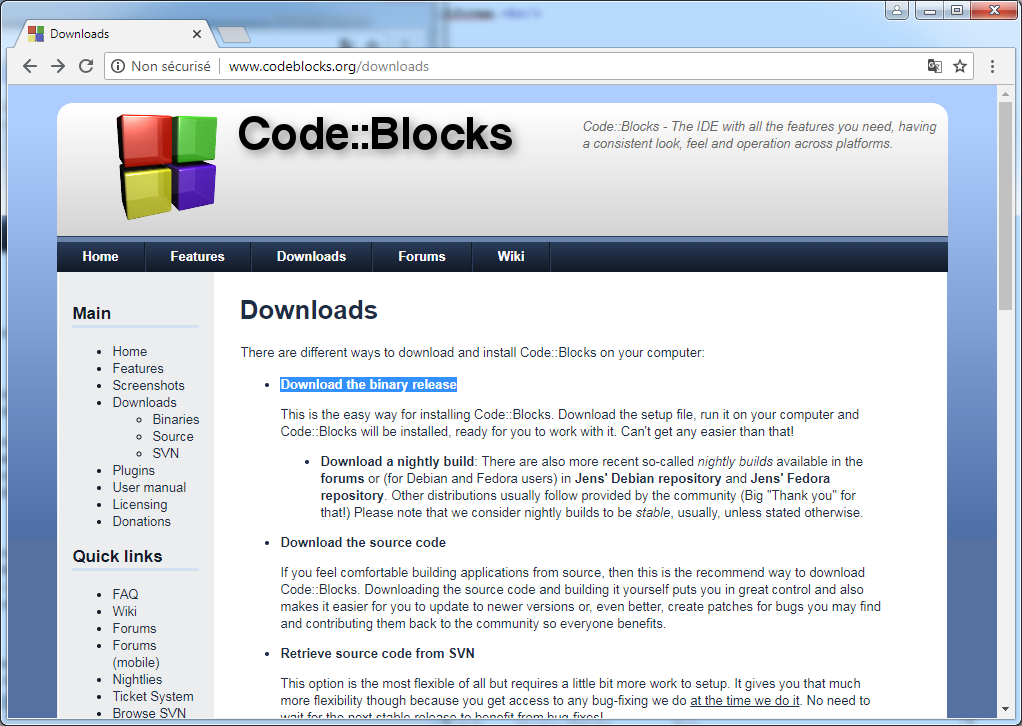
Go to
the download part in the Code::Blocks site.
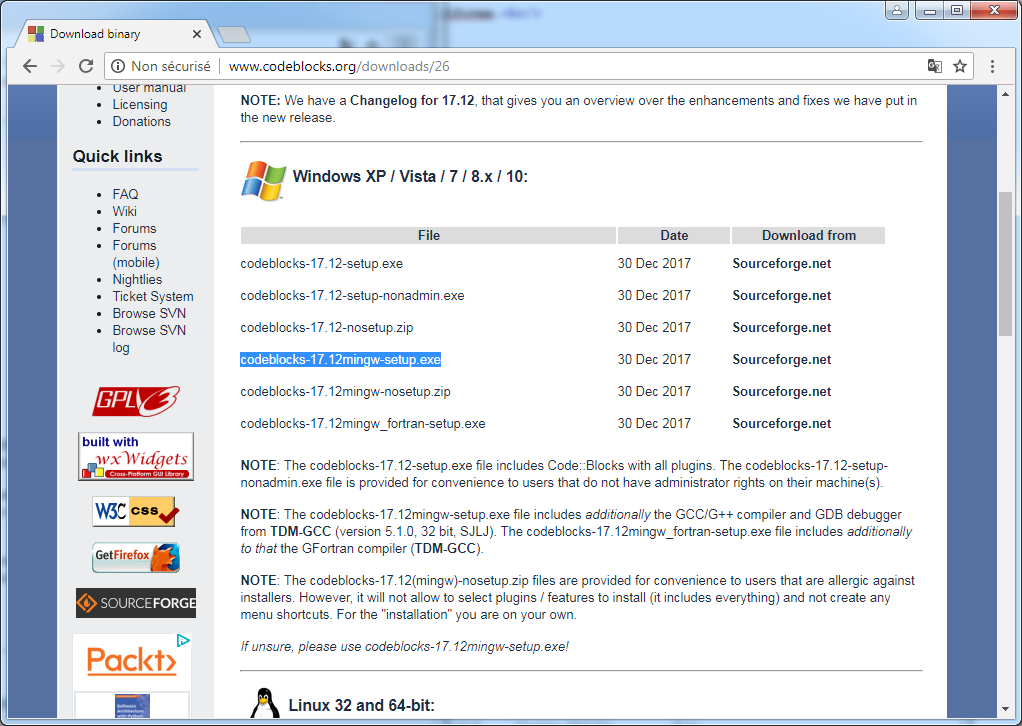
Click on "Download the binary release"
And select the "mingw-setup.exe".
Along with the IDE, this will download the MinGW C/C++ compiler which is a kind of port of GCC for Windows.
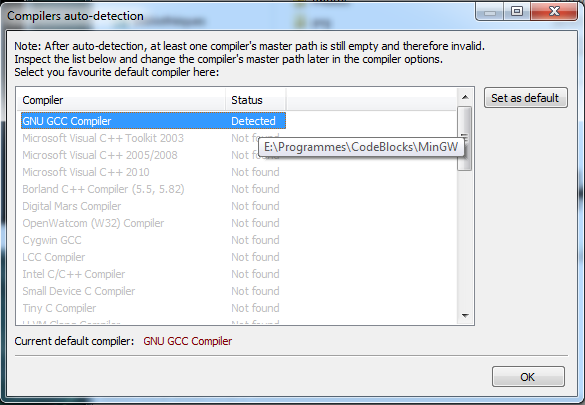
Once the installation is done it will ask you if you want to launch Code::Blocks.
If you do this you should see this window that tells you that Code::Blocks did scan your computer and set up
the MinGW compiler as the default GCC compiler.
Installing the SDL library
Go to
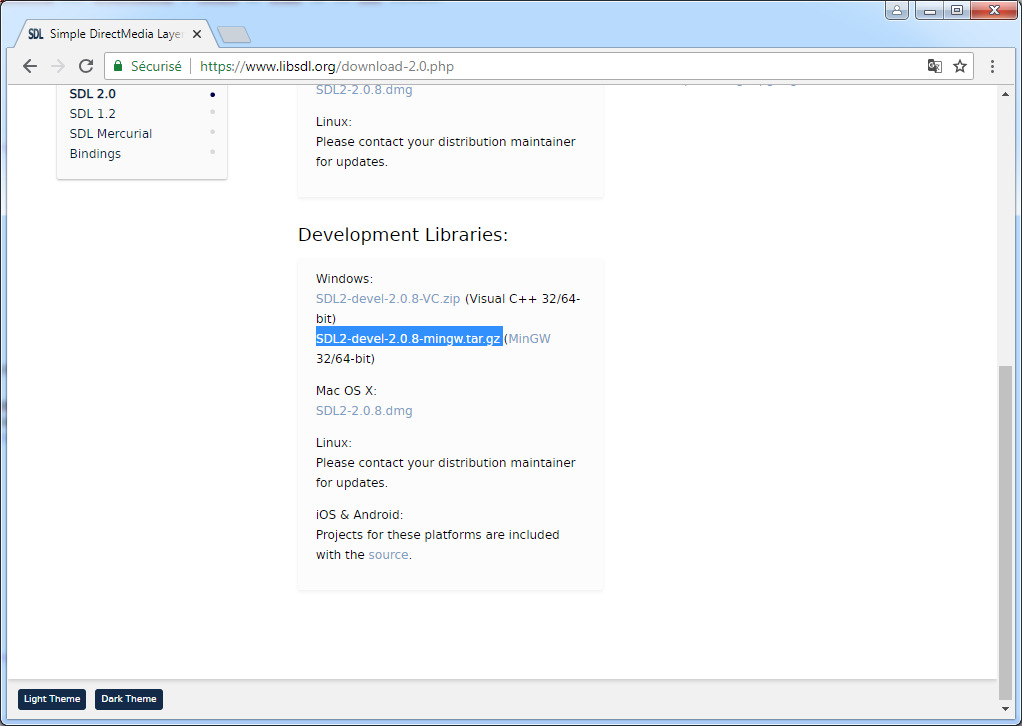
the SDL 2.0 download page.
Select the "mingw.tar.gz" file in the "Development Libraries" section.
It's an unix archive that you can open with a tool like WinRAR.
Depending on your tool you may have to open it in 2 times, because following the Unix habit it is a "double"
archive - first TARed then GZipped.
Anyways you should get to a folder named "SDL2-x.x.x" - where the "x.x.x" is a version number. Just copy this
folder anywhere you like.
Now we have to tell Code::Blocks where to find these files. In particular, it will need the ".h" include files,
needed to define the SDL functions for the compiler, and the ".a" files for the linker.
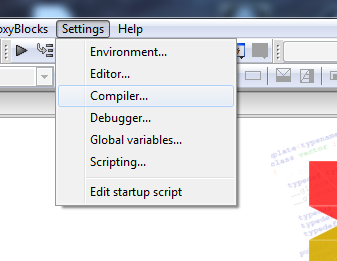
So open up Code::Blocks and go to the "Settings/Compiler" menu.
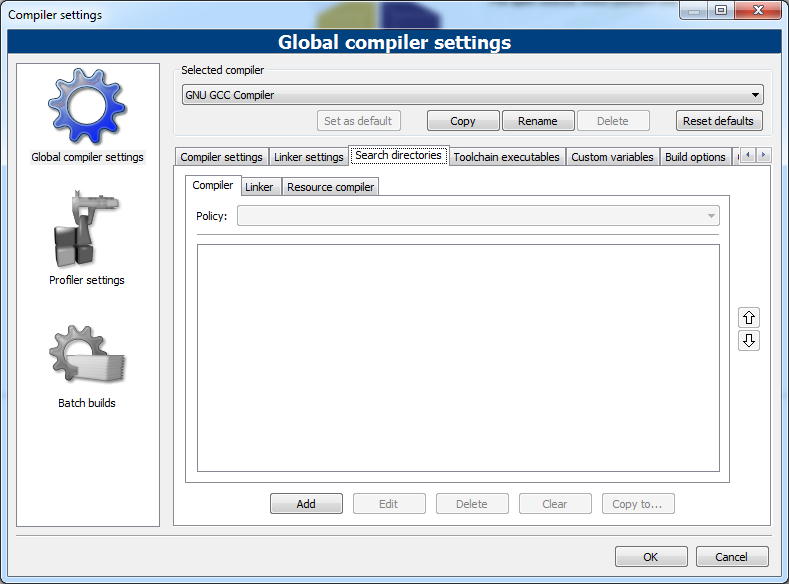
In the window that appears, select the "Search directories" tab.
In the "Compiler" tab, add the path "i686-w64-mingw32\include\SDL2" that is in your SDL directory.
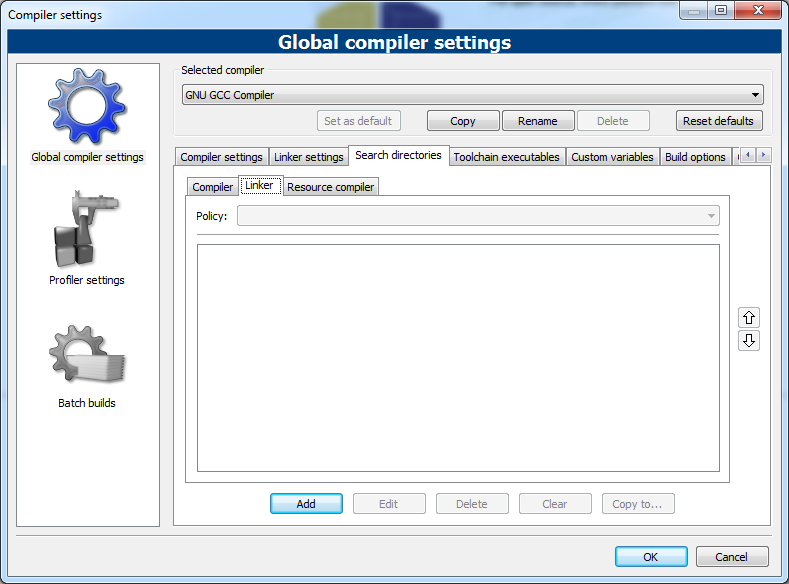
Then click on the "linker" tab.
And add the path to "i686-w64-mingw32\lib"
These are global settings, so you won't have to set these paths for each project you create.
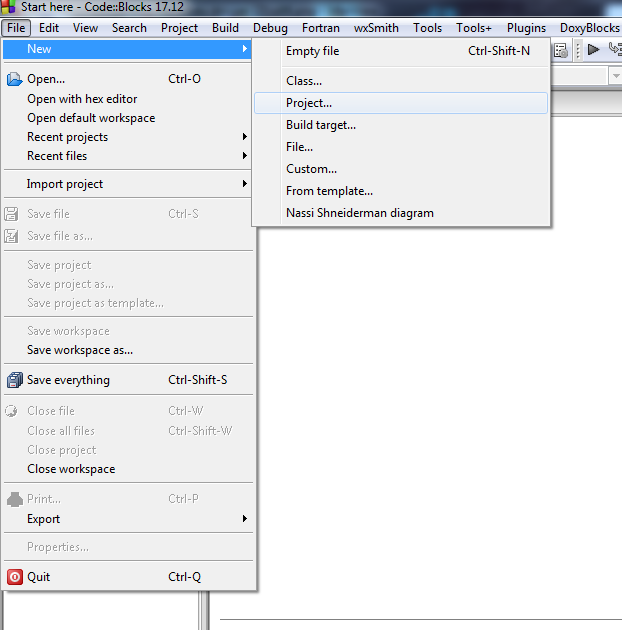
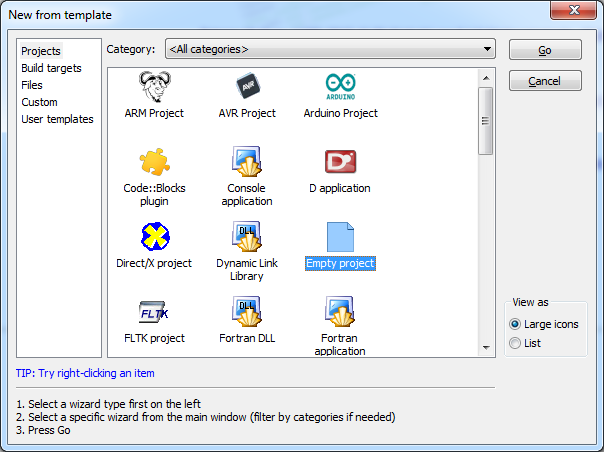
To create a project in Code::Blocks you can either click on the "Create a new project" button in the home page or
go to the "File/New/Project" menu.
Select an "empty" project.
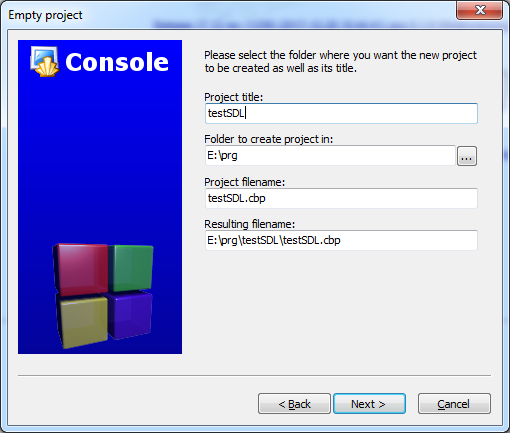
Choose a name for your project and the path where it will be created.
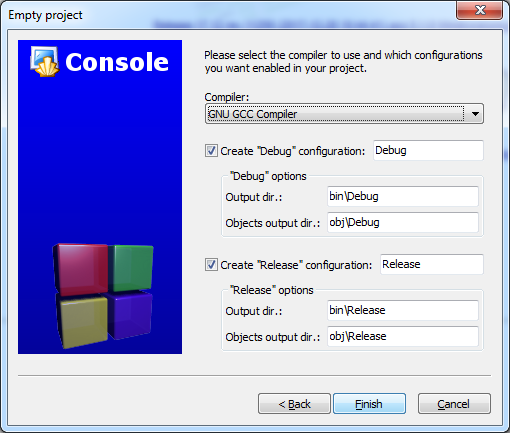
Code::Blocks will ask you if he should create a "Debug" and a "Release" configuration.
Just press "Finish".
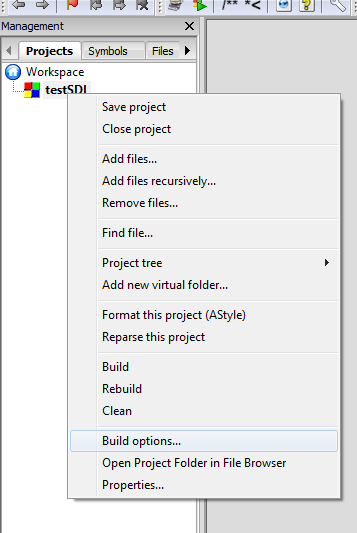
Now that our project is created we will configure it to use the SDL libraries.
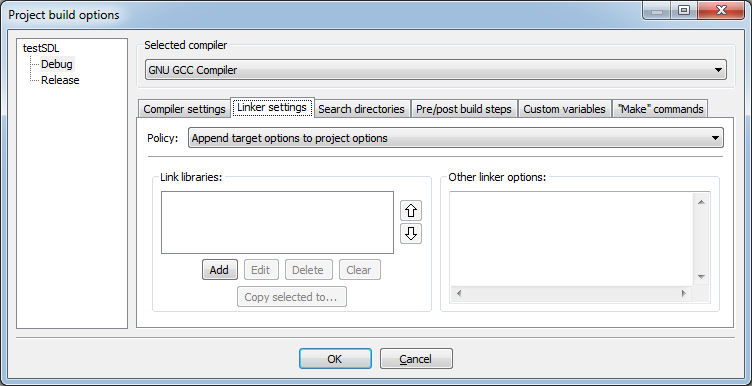
Right-click on your project's name and select "Build Options".
In the window that appears, click on "Linker settings".
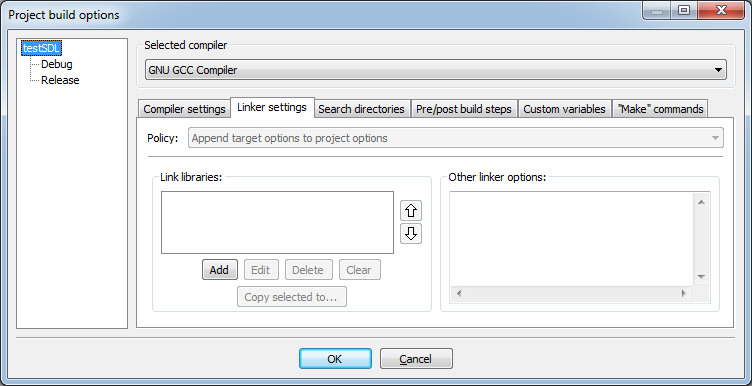
Click on your project's name on the left, so that the settings will be added both to the Debug and the Release
configurations.
And in the "Link libraries", add "libmingw32", "libSDL2main" and "libSDL2".
The order is important. If you made a mistake, you can move the libraries with the arrows on the right.
Now, go to the "i686-w64-mingw32\bin" directory where you installed the SDL.
You will find a "SDL2.dll" file.
Copy it to your project's directory. This is where your code will be executed when you launch it from Code::Blocks.
If you later want to launch your code by double-clicking on the ".exe", make sure to copy this dll in the same
directory.
Now let's add some code to our project and try to compile it to see if everything is well set up.
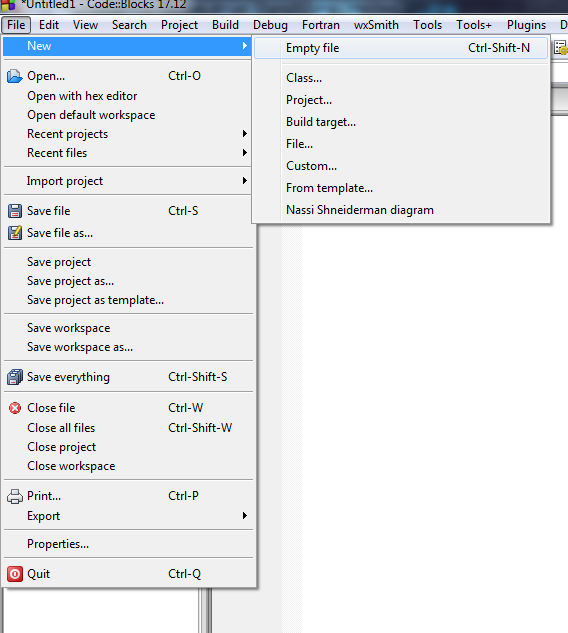
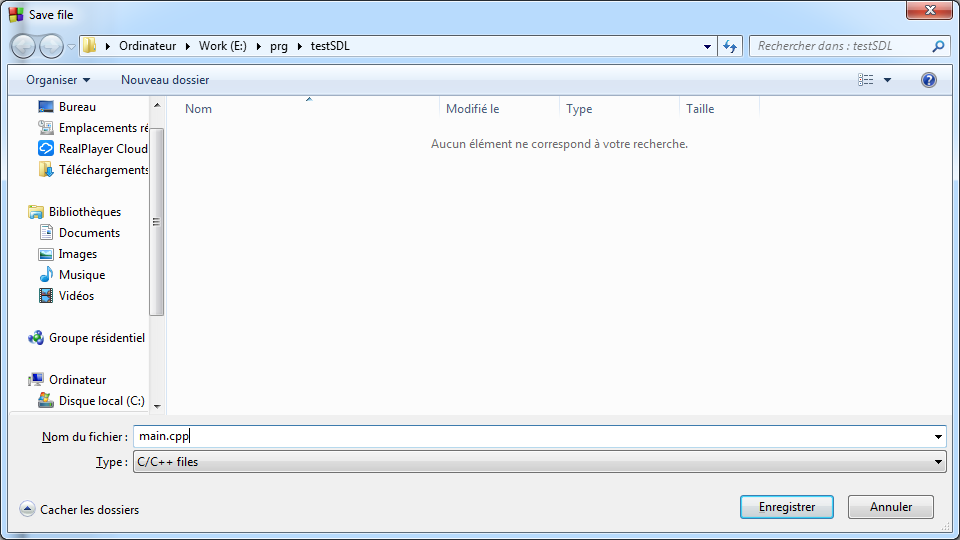
Select the "File/New/Empty file" menu.
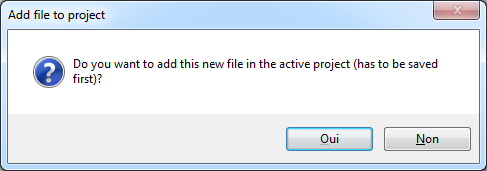
Code::Blocks asks you if you want to add this file to your project. Just say "yes".
Name this file "main.cpp".
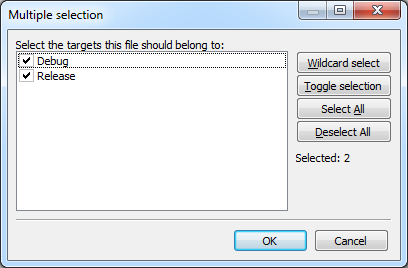
Code::Blocks asks you to which configurations you want to add this file.
Leave everything checked and click "OK".
Finally "main.cpp" is added to your project. Type this simple code in it
		#include "SDL.h"
		#include

		int main(int argc, char* argv[])
		{
			SDL_Window *window;

			SDL_Init(SDL_INIT_VIDEO);

			window = SDL_CreateWindow(
				"Test",
				SDL_WINDOWPOS_UNDEFINED,
				SDL_WINDOWPOS_UNDEFINED,
				640,
				480,
				SDL_WINDOW_SHOWN
			);

			SDL_Delay(3000);

			SDL_DestroyWindow(window);
			SDL_Quit();
			return 0;
		}
You can also download it
here.
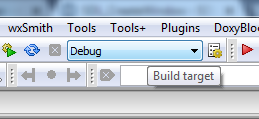
Now look at the first tool bar at the top of the screen. You will see a button to choose if you compile your code
in Debug or in Release mode.
For this simple example you can leave it on "Debug" as we won't need the fastest execution speed.
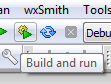
On the left of this button you should see a green triangle with a gear behind it.
Now just click on it. If you followed each step of this guide, the code should compile with no error.
Then a window named "Test" should appear, stay for 3 seconds, and disappear.
Well done, you just created your first SDL program !