Downloads
Executable for the map editor (Windows 32bits)
Executable for the game (Windows 32bits)
Before you try to compile the code go to the "Projects" tab on the left menu, select the "Run" settings for your kit,
and set the "Working directory" to the path of "editor\data" for the editor or "game\data" for the game.
The graphics
In this part we will include the graphics of all the ornates, but we will use only the decorative ones. The pressure
plates will be used later in another type of tiles.
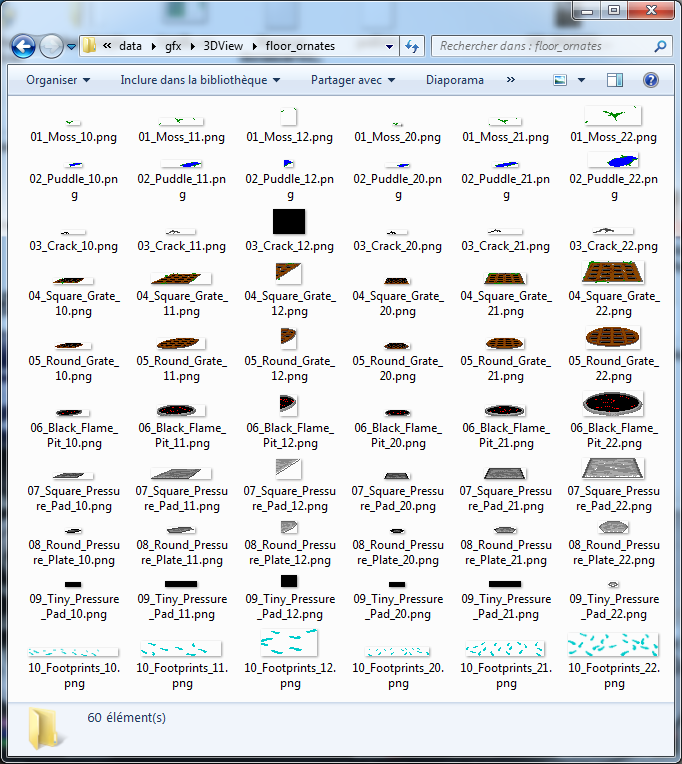
The graphics consists of 6 sprites for each types. 3 for the front tiles and 3 for the left ones.
The right tiles use the flipped graphics of the left ones.
Most of the ornates are symmetrical, and this way of drawing works quite good for them. But for the few other ones, many
bugs appeared in the original game.
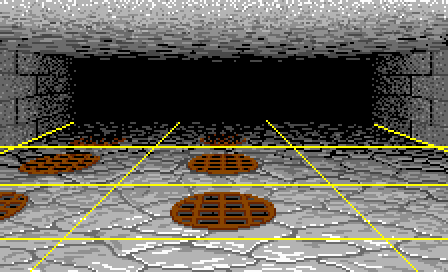
Bugs
For example, this is a puddle at the beginning of the level seen from two opposite directions
That is less a "bug" than a way to save disk space, as for ornates with no symmetry like this puddle, the graphists should
have drawn 3 times more sprites to handle all the cases.
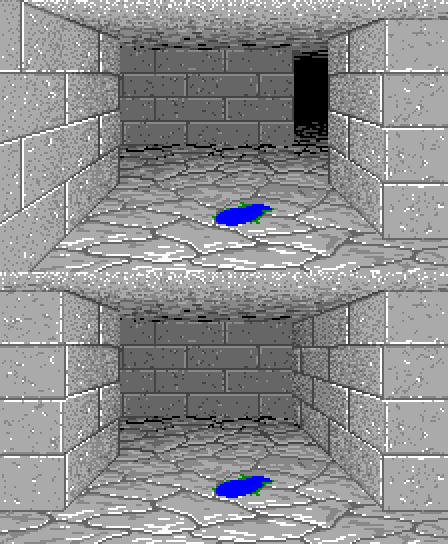
We saw in a previous part that the game used a trick to improve the movement feeling that consists in flipping the ground
image everytime we move to another tile or we turn at 90 degrees.
But even when the ground was flipped the ornates stayed the same. That is annoying for ornates that follow the stone pattern,
like the moss:
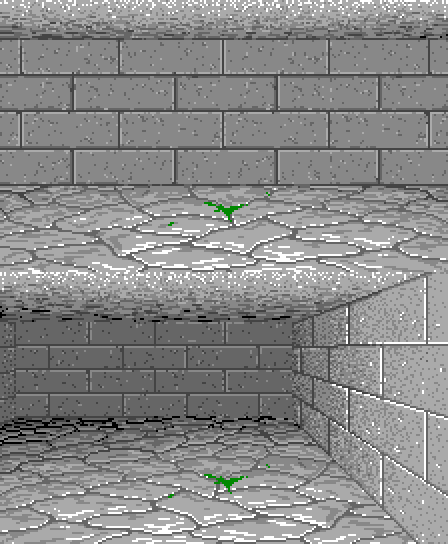
As most of the ornates are symmetrical, the fact of flipping them to draw the right tiles does not pose a problem.
But you can see that for the puddle it does not work at all:
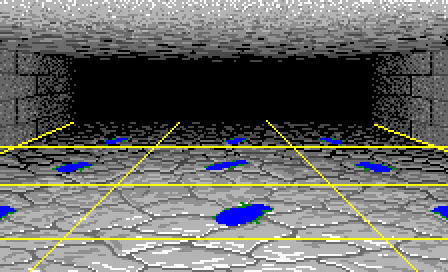
You can also see that the "middle front" puddle is not aligned with the others. That is it's real position in the original game.
Finally, except for a few ornate types, the graphics are not really darker with the distance. As for the wall ornates, that is
a limitation of the color palette used in the game.
I could have adressed some of these bugs, but to keep the code simple, I decided to display them as they were in the original game.
If you want to improve the graphics quality by yourself, you can easily fix the darkening problem and the flipping of the moss with
the ground using functions that I already wrote.
The floor ornates database
You can find "floor_ornates.xml" in the "databases" folder:
		<?xml version="1.0" encoding="ISO-8859-1"?>
		<floor_ornates>
			<floor_ornate name="None">
			</floor_ornate>

			<floor_ornate name="Moss">
				<image_10>01_Moss_10.png</image_10>
				<image_20>01_Moss_20.png</image_20>
				<image_11>01_Moss_11.png</image_11>
				<image_21>01_Moss_21.png</image_21>
				<image_12>01_Moss_12.png</image_12>
				<image_22>01_Moss_22.png</image_22>
				<pos_10 x="44" y="102"/>
				<pos_20 x="108" y="102"/>
				<pos_11 x="11" y="113"/>
				<pos_21 x="96" y="112"/>
				<pos_12 x="0" y="131"/>
				<pos_22 x="84" y="129"/>
			</floor_ornate>

			[...]
		</floor_ornates>
The coordinates of the flipped tiles will be computed by the code.
The numbers following the file names - 10, 20, 11, a.s.o. - denote the coordinates in the table that we used to define the walls.
They are the same as the numbers that we used to name the walls PNG files.
You will notices that some types do not contain 6 images because some of them are empty. I.e. the "Tiny Pressure Pad" is only
visible on the tile right in front of us.
The floor ornates in the editor
		<?xml version="1.0" encoding="ISO-8859-1"?>
		<tiles>
			<tile name="Empty">
			</tile>

			<tile name="Ground">
				<image>Tile.png</image>
				<param type="ornate">Ornate</param>
			</tile>
		</tiles>
		class CTile
		{
		public:
			CTile();
			virtual ~CTile();

			void    setType(uint8_t type);
			uint8_t getType();
			void    copyWithoutWalls(CTile& rhs);
			CTile&  operator=(CTile& rhs);
			void    load(FILE* handle);
			void    save(FILE* handle);

			CParam* findParamByName(QString name);
			uint8_t getOrnateParam(QString name);

			std::vector    mParams;
			CWall   mWalls[eWallSideMax];

		private:
			void    deleteParams();

			uint8_t mType;
		};
copyWithoutWalls() and the "=" operator are used for the clipboard tools.
load() and save() save the parameters values along with the tile type in the map file.
And there are functions to find a parameter by it's name that works the same way as the ones used for the walls.
The floor ornates in the game
We also need to load "floor_ornates.xml" but first let's see how it will be stored. There is a new file
"tiles.h" where you can find this:
		class CTiles
		{
		public:
			struct COrnateElement
			{
				QString image;
				CVec2   pos;
			};

			struct COrnateData
			{
				QString name;
				COrnateElement table[WALL_TABLE_HEIGHT][(WALL_TABLE_WIDTH + 1) / 2];
			};

			CTiles();

			void    drawFloorOrnate(QImage* image, CVec2 tablePos, int ornate);
			void    readFloorOrnatesDB();
			void    readTilesDB();

			std::vector<COrnateData>  ornatesDatas;
		};
We only need half of the size because the images for the right tiles are flipped.
Of course this table is never completely filled because i.e. there is no image on the 0 column. But it will avoid computations
in the code.
Each element of this table is a structure that contains the name of the image and it's position.
Now we read the database in "tiles.cpp" like this:
		void    CTiles::readFloorOrnatesDB()
		{
			QDomDocument doc;

			QFile f("databases/floor_ornates.xml");
			f.open(QIODevice::ReadOnly);
			doc.setContent(&f);
			f.close();

			QDomElement root = doc.documentElement();
			QDomElement ornate = root.firstChild().toElement();

			while(!ornate.isNull())
			{
				if (ornate.tagName() == "floor_ornate")
				{
					COrnateData   newOrnate;

					newOrnate.name = ornate.attribute("name");

					QDomElement ornateInfo = ornate.firstChild().toElement();

					while(!ornateInfo.isNull())
					{
						QString tag = ornateInfo.tagName();

						if (tag.startsWith("image_") == true)
						{
							std::string str = tag.toUtf8().constData();
							int x = str.at(str.size() - 2) - '0';
							int y = str.at(str.size() - 1) - '0';
							COrnateElement* elem = &newOrnate.table[y][x];
							elem->image = QString("gfx/3DView/floor_ornates/") + ornateInfo.text();
						}
						else if (tag.startsWith("pos_") == true)
						{
							std::string str = tag.toUtf8().constData();
							int x = str.at(str.size() - 2) - '0';
							int y = str.at(str.size() - 1) - '0';
							COrnateElement* elem = &newOrnate.table[y][x];
							elem->pos.x = ornateInfo.attribute("x").toInt();
							elem->pos.y = ornateInfo.attribute("y").toInt();
						}

						ornateInfo = ornateInfo.nextSibling().toElement();
					}
					ornatesDatas.push_back(newOrnate);
				}
				ornate = ornate.nextSibling().toElement();
			}
		}
The ornates are then displayed in displayMainView():
		void CGame::displayMainView(QImage* image)
		{
			[...]

			for (int y = 0; y < WALL_TABLE_HEIGHT; ++y)
				for (int x = 0; x < WALL_TABLE_WIDTH; ++x)
				{
					tablePos = walls.getDrawSequence(CVec2(x, y));
					localPos = walls.getMapPos(tablePos);
					mapPos = player.getPosFromLocal(localPos);
					CTile*  tile = map.getTile(mapPos);

					if (tile != NULL)
					{
						// draw the walls
						drawWall(image, tile, tablePos, eWallSideUp, flip);
						drawWall(image, tile, tablePos, eWallSideLeft, flip);
						drawWall(image, tile, tablePos, eWallSideRight, flip);

						// draw the floor ornates
						if (tile->getType() == eTileGround)
						{
							//------------------------------------------------------------------------------
							// ground tile
							int ornate = tile->getOrnateParam("Ornate");
							tiles.drawFloorOrnate(image, tablePos, ornate);
						}

						// draw objects
						// draw ennemies
					}
				}
		}