Downloads
Executable for the map editor (Windows 32bits)
Executable for the game (Windows 32bits)
Before you try to compile the code go to the "Projects" tab on the left menu, select the "Run" settings for your kit,
and set the "Working directory" to the path of "editor\data" for the editor or "game\data" for the game.
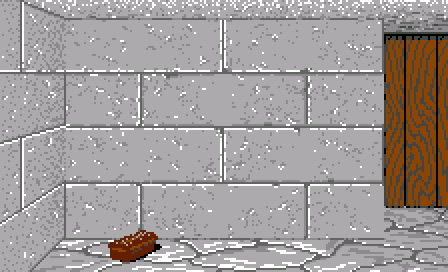
The graphics
a little more complexity.
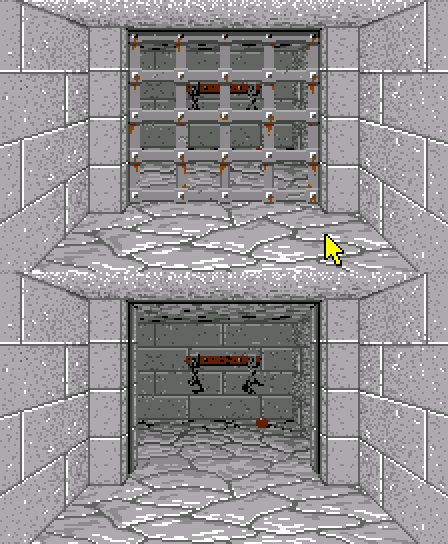
As the original game was tile-based, the door stands in the middle of a tile.
It is composed of the door itself, a frame around it and sometimes a button on the frame.
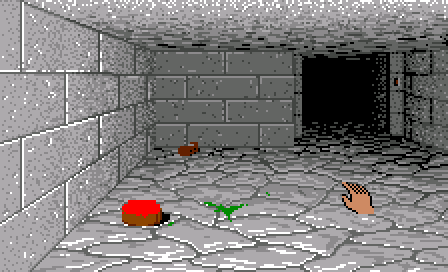
But when we look at the graphics, we can see that the frame is in 3 parts.
The images Frame_Left_* and Frame_Far_Left_0 are used for the left part of the frame.
The right part uses these images flipped horizontally.
And there are 2 versions of the top part of the frame. This part is not visble on the farthest doors.
Frame_Face_2 is displayed when we are on the same tile as the door and we are looking at the side walls.
In the editor
<?xml version="1.0" encoding="ISO-8859-1"?>
<doors>
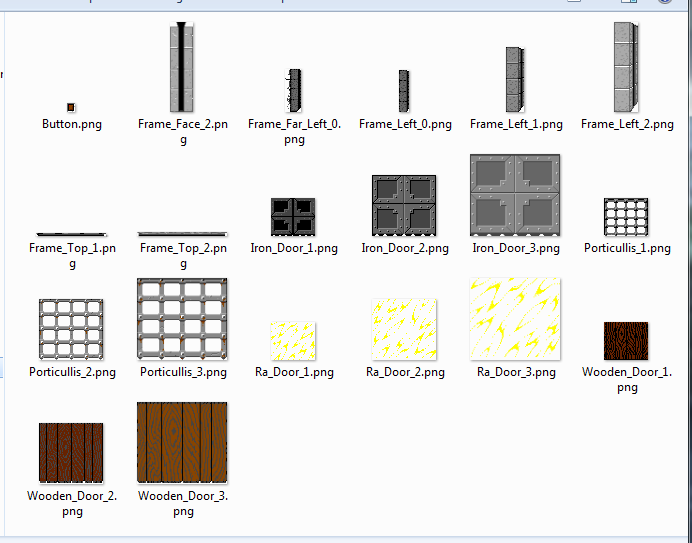
<door name="Porticullis">
<image1>Porticullis_1.png</image1>
<image2>Porticullis_2.png</image2>
<image3>Porticullis_3.png</image3>
</door>
<door name="Wooden Door">
<image1>Wooden_Door_1.png</image1>
<image2>Wooden_Door_2.png</image2>
<image3>Wooden_Door_3.png</image3>
</door>
<door name="Iron Door">
<image1>Iron_Door_1.png</image1>
<image2>Iron_Door_2.png</image2>
<image3>Iron_Door_3.png</image3>
</door>
<door name="Ra Door">
<image1>Ra_Door_1.png</image1>
<image2>Ra_Door_2.png</image2>
<image3>Ra_Door_3.png</image3>
</door>
</doors>

You can think that the easiest way to do this is to draw the door in the tile graphics and to add a "rotation"
parameter to it.
But if we want to do this without writing a particular case in the editor, every tile should have this rotation parameter.
And it should be saved in the map file. But for 99% of the tiles this parameter would be useless, and we would end with
bigger map files.
Another way to achieve this would be to create 2 types of door tiles, for the horizontal ones and for the vertical ones.
But that would be quite inelegant, as we would have to add the same parameters to the 2 types of tiles. And as you will see
later the doors will require many parameters.
As a general rule, duplicating datas like that lead to more bugs - i.e. if we add a parameter to one of type of tile and we
forget to add it to the other type.
Furthermore, when we draw a wall it would be useful to know directly if it's the side of a door without having to check the
corresponding tile, as at some point it will be drawn differently.
And yet it will be important to store most of the data of the wall in the tile where it lies. Because of the same problem of data
duplication. If each wall around the door hold a bool saying that the door is opened it will obviously lead to confusion if their
state don't change exactly at the same time. And again it will take more space in the map file.
So I opted for a 3rd way to represent the doors. The tile won't be displayed with a special graphic - it will be the same as a
plain ground tile. It will hold all the datas of the door, but no specific orientation.
And the side walls will have a special type with a graphic that corresponds to an half of the door, but no other data.
<?xml version="1.0" encoding="ISO-8859-1"?>
<walls>
<wall name="Nothing">
</wall>
<wall name="Simple">
[...]
</wall>
<wall name="Portrait">
[...]
</wall>
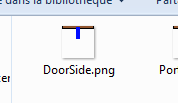
<wall name="Door Side">
<image>DoorSide.png</image>
</wall>
</walls>
And in the code it will be easy to find the orientation of a door from it's tile by checking if one of it's walls is a "door side" wall.
Parameters of a door
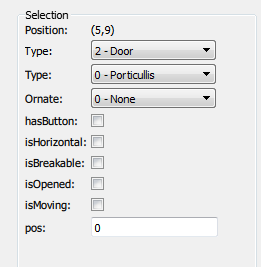
Type is the type of the door as we defined it in "doors.xml" - Iron, Wooden, etc...
Like for the walls and for the floor, there are ornates for the doors too. This way, combining the 4 types of doors with the various ornates,
we get a large number of door varieties. Unfortunately we won't have time to talk about them in this part.
hasButton tells if the door has a button on it's frame to open it.
isHorizontal tells if the door opens vertically by sliding into the ceiling, or horizontally by splitting in 2 and each part sliding into the
"side" walls.
isBreakable: we will see later that some doors don't have a way to open them other than "chopping" them with an axe or a sword.
isOpened tells if the door is opened or closed. It will mainly be modified in the code, as most of the doors will start closed.
isMoving and pos will be used by the code to animate the door.
And here is "tiles.xml":
		<tiles>
			<tile name="Empty">
			</tile>

			<tile name="Ground">
				[...]
			</tile>

			<tile name="Door">
				<image>Tile.png</image>
				<param type="door">Type</param>
				<param type="door_ornate">Ornate</param>
				<param type="bool">hasButton</param>
				<param type="bool">isHorizontal</param>
				<param type="bool">isBreakable</param>
				<param type="bool">isOpened</param>
				<param type="bool">isMoving</param>
				<param type="int">pos</param>
			</tile>
		</tiles>
But as we start to have quite a lot of parameters, I used macros to reduce the code size and make it easer to read.
You will find various macros in "Map.cpp". Here is for example the loading of the wall's parameters:
		#define LOAD_PARAM(_enum,_struct,_type,_expr) \
			case _enum: \
				{ \
					_type value; \
					fread(&value, sizeof(value), 1, handle); \
					((_struct*)mParams[i])->mValue = (_expr); \
				} \
				break;

		void  CWall::load(FILE* handle)
		{
			uint8_t type;
			fread(&type, 1, 1, handle);
			setType(type);

			std::vector<CParamType>& paramTypes = map.mWallsParams[mType];

			for (size_t i = 0; i < paramTypes.size(); ++i)
			{
				switch (paramTypes[i].mType)
				{
					LOAD_PARAM(eParamOrnate, CParamOrnate, uint8_t, value)
					LOAD_PARAM(eParamInt, CParamInt, int32_t, value)
					LOAD_PARAM(eParamBool, CParamBool, uint8_t, (value == 0 ? false : true))

					default:
						break;
				}
			}
		}
		void  CTile::load(FILE* handle)
		{
			uint8_t type;
			fread(&type, 1, 1, handle);
			setType(type);

			std::vector<CParamType>& paramTypes = map.mTilesParams[mType];

			for (size_t i = 0; i < paramTypes.size(); ++i)
			{
				switch (paramTypes[i].mType)
				{
					LOAD_PARAM(eParamOrnate, CParamOrnate, uint8_t, value)
					LOAD_PARAM(eParamDoor, CParamDoor, uint8_t, value)
					LOAD_PARAM(eParamDoorOrnate, CParamDoorOrnate, uint8_t, value)
					LOAD_PARAM(eParamInt, CParamInt, int32_t, value)
					LOAD_PARAM(eParamBool, CParamBool, uint8_t, (value == 0 ? false : true))

					default:
						break;
				}
			}
		}
Drawing in the game
And also to find clipping rectangles as in some cases only a part of the graphics are displayed.
You can see the result of this data collection in the file "test_doors.xcf". The red rectangles are the clipping rects.
The graphs were clipped to avoid persepective errors, as the frames were only drawn for a door that is in front of us.
So a few tricks were used. For example, in this position, a part of the frame should be visible, but the door was shifted
to hide it.
For the farthest doors, like in the screenshot below, a part of the frame was clipped - the left one in this case - also
to avoid perspective errors.
So I created a "doors.cpp" file to store all those coordinates. You can see that most of this file contains big tables
for each part of the frame and the door graphics:
		// table for the left part of the frame
		SDoorElem   tabLeftFrame[WALL_TABLE_HEIGHT][WALL_TABLE_WIDTH] =
		{
			// Row 3 (farthest)
			{
				{"", 0, 0, 0, 0, 0, 0},  // 03
				{"Frame_Far_Left_0.png",  16, 59,  16, 59,  31, 101}, // 13
				{"Frame_Left_0.png",      82, 60,  82, 60,  91, 101}, // 23
				{"Frame_Far_Left_0.png", 141, 60, 147, 60, 150, 102}, // 33
				{"", 0, 0, 0, 0, 0, 0}   // 43
			},

			[...]
		}
		void CDoors::draw(QImage* image, CTile* tile, CVec2 tablePos)
		{
			if (isFacing(tile) == true)
			{
				drawFrameElement(image, tablePos, tabTopFrame, false);
				drawFrameElement(image, tablePos, tabLeftFrame, false);
				drawFrameElement(image, tablePos, tabRightFrame, true);

				SDoorElem&  cell = tabDoor[tablePos.y][tablePos.x];
				if (cell.file[0] != 0)
				{
					int doorType = tile->getDoorParam("Type");
					int doorNum = cell.file[0] - '0';
					std::string fileName = doorsDatas[doorType].files[doorNum].toUtf8().constData();
					drawDoor(image, tablePos, fileName);
				}
			}
		}
tables and draw the image.
This draw function is called in CGame::displayMainView(), where we can see another complication for the future.
As we draw the graphics "tile by tile" in this part, and as the doors stands in the middle of a tile, it will interfere with the drawing of
objects on the ground.
Some objects will appear behind the door and the others will be drawn in front of it. So we will need to have 2 functions to draw all the
objects on this tile.
		void CGame::displayMainView(QImage* image)
		{
				[...]

				for (int y = 0; y < WALL_TABLE_HEIGHT; ++y)
					for (int x = 0; x < WALL_TABLE_WIDTH; ++x)
					{
						[...]

						if (tile != NULL)
						{
							// draw the walls
							[...]

							// draw the floor ornates
							if (tile->getType() == eTileGround)
							{
								[...]
							}

							// draw objects back row

							// draw the doors
							if (tile->getType() == eTileDoor)
							{
								doors.draw(image, tile, tablePos);
							}

							// draw objects front row
							// draw ennemies
						}
					}
			}
		}
The last graphic
are looking toward a side wall.
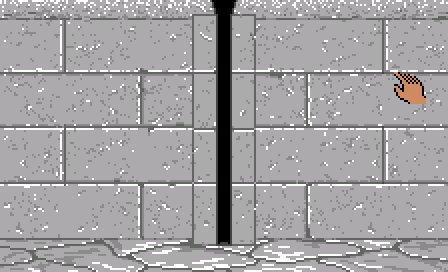
It is simply drawn in CGame::drawWall(). It's pretty similar to the portrait that we draw on the mirrors:
		void CGame::drawWall(QImage* image, CTile* tile, CVec2 tablePos, EWallSide side, bool flip)
		{
			[...]

					// draw the ornates
					CWall*  wall = &tile->mWalls[playerSide];

					if (wall->getType() == eWallSimple)
					{
						//------------------------------------------------------------------------------
						// simple wall

						[...]
					}
					else if (wall->getType() == eWallPortrait)
					{
						//------------------------------------------------------------------------------
						// champion mirror

						[...]
					}
					else if (wall->getType() == eWallDoorSide)
					{
						//------------------------------------------------------------------------------
						// side of a door
						if (tablePos == CVec2(2, 3) && side == eWallSideUp)
						{
							QImage  doorFrame = fileCache.getImage("gfx/3DView/doors/Frame_Face_2.png");
							graph2D.drawImage(image, CVec2(96, 33), doorFrame);
						}
					}

			[...]
		}
they are closed.
Next time we will add collision and see how to open them.