Downloads
Executable for the map editor (Windows 32bits)
Executable for the game (Windows 32bits)
Before you try to compile the code go to the "Projects" tab on the left menu, select the "Run" settings for your kit,
and set the "Working directory" to the path of "editor\data" for the editor or "game\data" for the game.
Level 2 doors
In this part we will begin to set up the mechanisms that were used in the original game to open each door, and to set
their final appearance.
So let's start by numbering them, then we'll look at each door one by one.
Here I numbered them in the same order as we will need to open them when we play this level.
Doors 1 and 2
Note that the images comes from the original game. We don't have mummies yet.
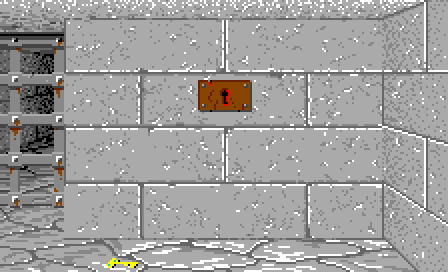
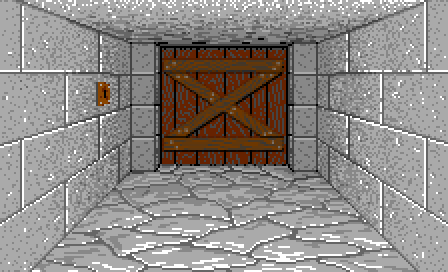
Door 3
The key should go into a lock that is just one tile to the right of the door
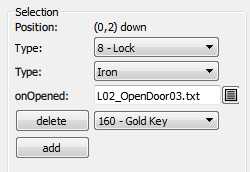
Now let's see how to code these locks.
Locks
		<wall name="Lock">
			<image>Lock.png</image>
			<param type="enum" values="Iron;Fountain">Type</param>
			<param type="script">onOpened</param>
			<param type="stack"/>
		</wall>
like the one in the image above and another one that is hidden in a fountain.
The "onOpened" parameter tells which script we will execute when the lock is opened.
Most of the locks only need one object to be opened, we will see later that some locks require several objects.
So to tell what objects we need, we will use a "stack" parameter like for the alcoves.
But contrary to the alcoves, the objects in this stack will not appear as real objects in the game.
It will only be a list of "virtual" objects that the lock needs.
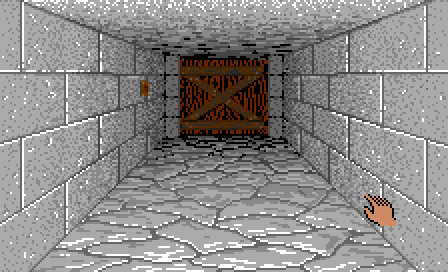
In the game, the drawing of these walls is simple: we only draw the ornate and add a mouse area.
		else if (wall->getType() == eWallLock)
		{
			//------------------------------------------------------------------------------
			// lock
			int type = wall->getEnumParam("Type");
			CRect   rect = walls.drawOrnate(image, tablePos, side, ORNATE_IRON_LOCK + type);

			if (tablePos == CVec2(2, 3) && side == eWallSideUp)
				mouse.addArea(eMouseAreaG_Lock, rect, eCursor_Hand, (void*)mapPos.x, (void*)mapPos.y, (void*)playerSide);
		}
First, we get the position of the wall, and find our "virtual" objects' stack.
		else if (clickedArea->type == eMouseAreaG_Lock)
		{
			CVec2   pos;
			EWallSide   side;

			pos.x = (int)clickedArea->param1;
			pos.y = (int)clickedArea->param2;
			side = (EWallSide)((int)clickedArea->param3);

			CObjectStack* stack = map.findObjectsStack(pos, side);
hand - that's to say the "key".
If its the case, we remove this object both from the stack and from our hand.
Note that removing the object from the stack prevent us from using several keys of the same type in the lock.
			for (size_t i = 0; i < stack->getSize(); ++i)
				if (stack->getObject(i).getType() == mouse.mObjectInHand.getType())
				{
					stack->removeObject(i);
					mouse.mObjectInHand.setType(0);
					sound->play(pos, "sound/Switch.wav");
					break;
				}
"onOpened" script.
			if (stack->getSize() == 0)
			{
				CWall*  wall = &map.getTile(pos)->mWalls[side];
				std::string script = wall->getScriptParam("onOpened");
				scripts.execute(script);
			}
		}
We only have to set the "isOpened" parameter of the target door to "true".
		Target Tile 1 3
		SetBool isOpened true
in place of the "true".
And later we will see that we need a "switch" script that turns the "true" to "false" and vice versa.
I added scripts to all the doors needing a key that I will talk about in this part and removed their buttons.
Doors 4 and 6
Door 5
We won't implement levers and switches in this part, so I left it with a button to open it.
Door 7

For door 7 there is a little puzzle with pressure plates to solve.
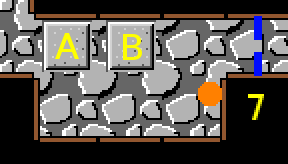
When you step on the "A" plate, it opens the door, but if you step on "B", it closes.
So you have to turn around "B".
To implement this puzzle, we only have to assign an "open" script to "A" and a "close" script to "B".
Door 8
It has a particular ornate. We will talk about the new ornates at the end of this part.
It leads to a room where you will find the keys for the 2 next doors.
Doors 9 and 10
Between them there should be a monster, but we will add them in a future part.
Door 11
Doors 12 and 13
These 2 doors open up by completing a more complex puzzle.

The blue plates switch the state of door 12, and the green ones switch door 13.
You should be able to go through this by walking back and forth.
To implement this we need a new script command "SwitchBool" that inverts the value of a parameter:
		void CScripts::executeSwitchBool(std::vector<std::string>& words)
		{
			QString param = QString::fromStdString(words[1]);

			if (mTargetType == eTargetType_Tile)
			{
				CTile*  target = (CTile*)mTarget;
				bool    value = target->getBoolParam(param);
				target->setBoolParam(param, !value);
			}
			else
			{
				CWall*  target = (CWall*)mTarget;
				bool    value = target->getBoolParam(param);
				target->setBoolParam(param, !value);
			}
		}
Door 14

Door 15
To open this door, you have to leave an object on the tile of the plate on the right.
I had to change the pressure plates code a little bit to take into account the objects we drop on them.
		if (tile->getType() == eTilePressPlate)
		{
			if (tile->getBoolParam("byChampions") == true && interface.isChampionEmpty(0) == false && player.pos == pos)
			{
				state = true;
			}
			else if (tile->getBoolParam("byObjects") == true)
			{
				CVec2   pos2 = pos * 2;

				if (map.findObjectsStack(pos2, eWallSideMax) != NULL ||
					map.findObjectsStack(pos2 + CVec2(1, 0), eWallSideMax) != NULL ||
					map.findObjectsStack(pos2 + CVec2(0, 1), eWallSideMax) != NULL ||
					map.findObjectsStack(pos2 + CVec2(1, 1), eWallSideMax) != NULL)
				{
					state = true;
				}
			}
Door 16
For the moment, I leave it with a button.
Doors 17 and 18
Anyways they are unlocked with keys like the others.
Doors 19 and 20
Door 21
Normally we should solve a puzzle with a teleporter to get its key, but for the moment you can pick it up
without any problem.
Door 22
We will probably implement that after the weapons' attacks.
Door 23
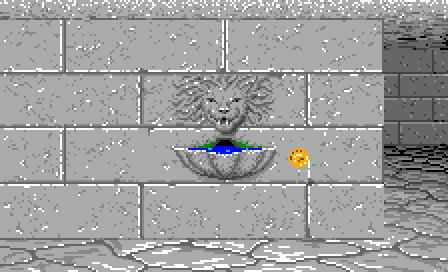
Door 23 opens up when you put a coin in the fountain to the right.
This fountain acts only as a lock. We will see the "drinking" part in the future.
Door 24
Door 25
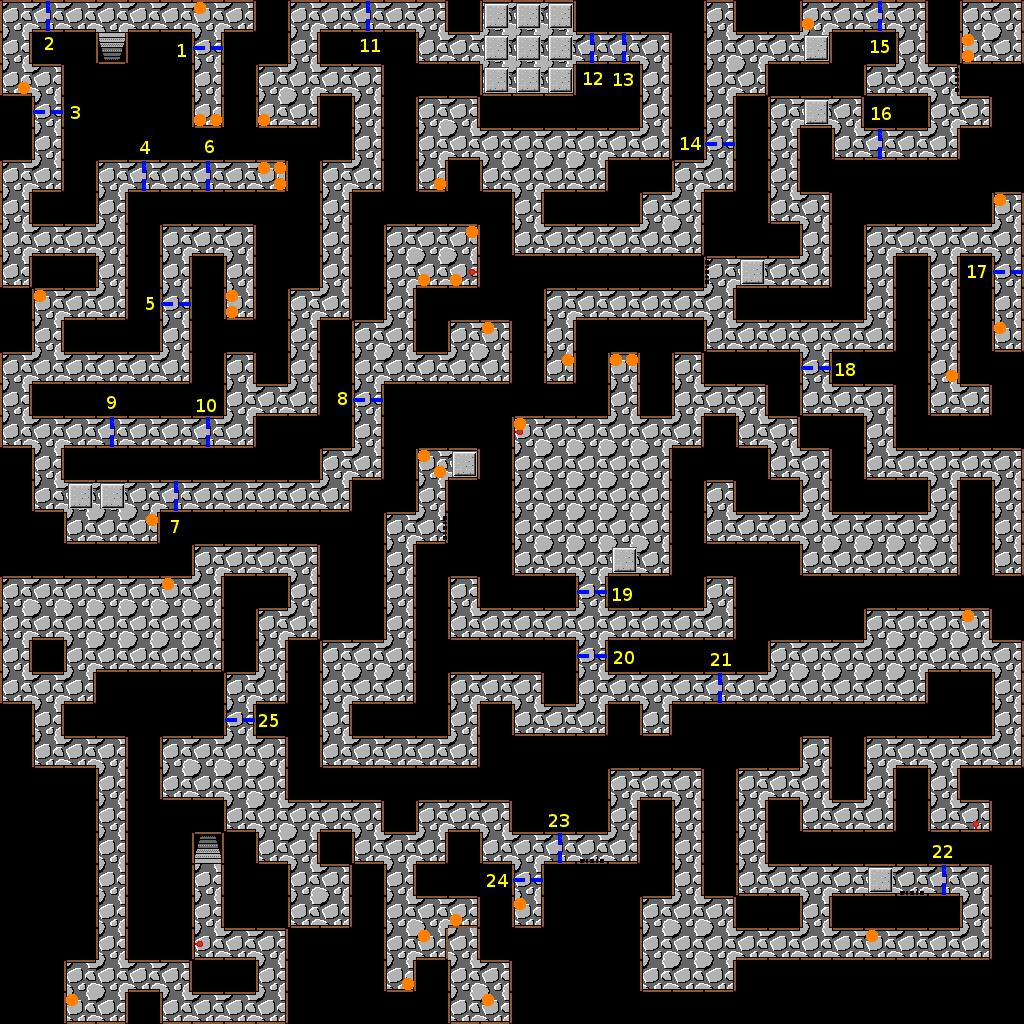
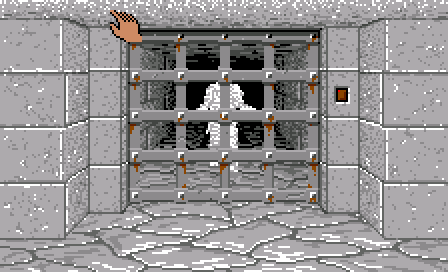
New doors ornates
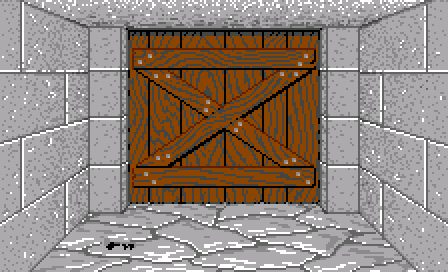
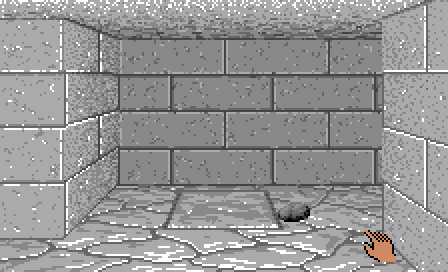
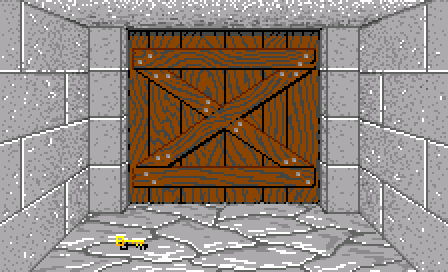
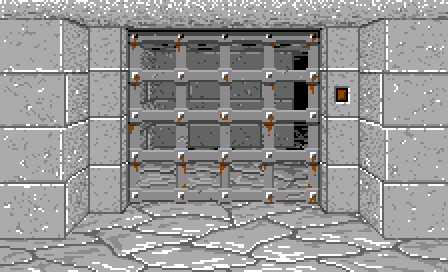
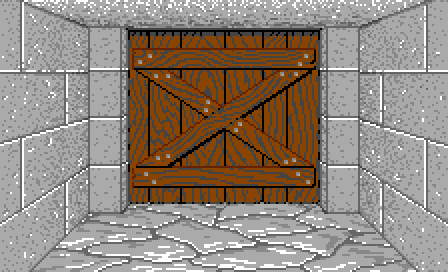
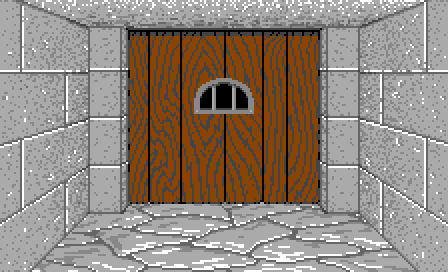
- A barred wooden door
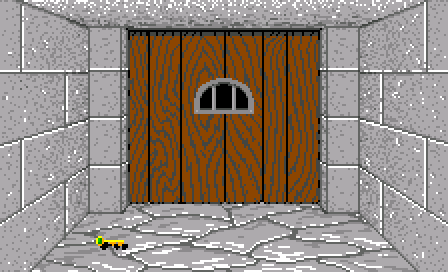
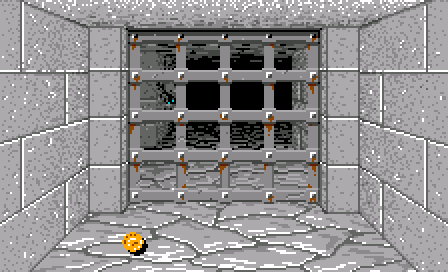
- A wooden door with an arched grid
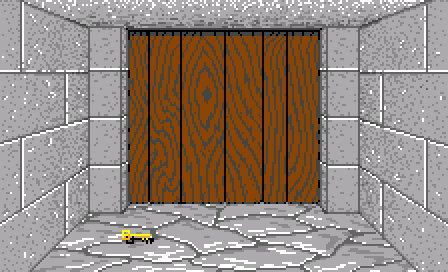
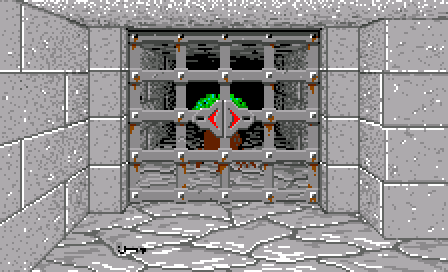
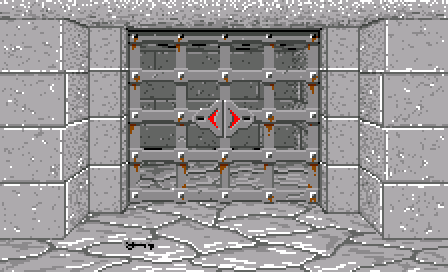
- And a porticullis with "triangle lock"
The ornate for the barred door does not have the same color as the door itself.
That's because the doors images were precalculated to fit the color palette of the original game.
But on the other hand, we have only one image for the ornate and we scale and darken it using our own functions.
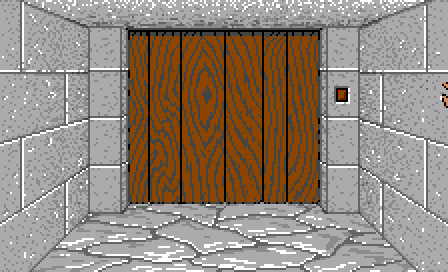
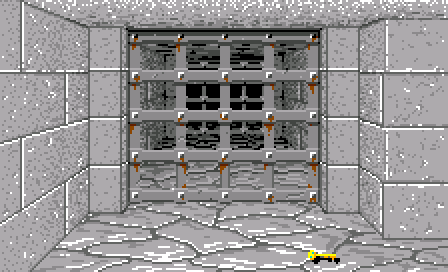
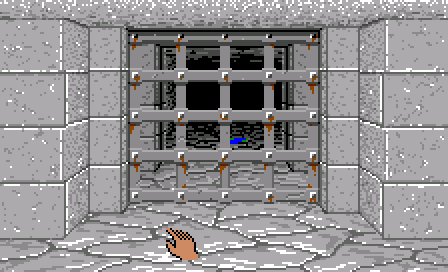
The arched grid has another problem.
It is a particular ornate as we can see through it.
Here is what it looks like.

The pink color was used in the original game to tell that these pixels should be transparent.
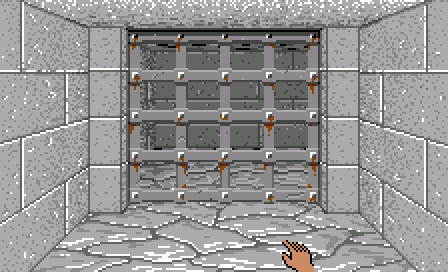
So, first we have to draw this image on the door, then we have to remove all the pink pixels.
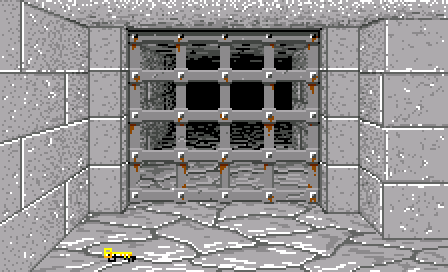
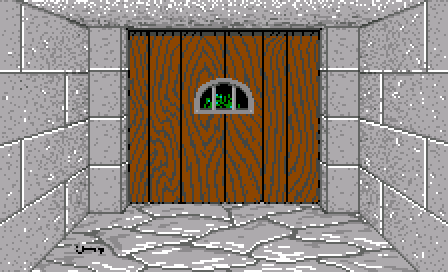
Here is the result:
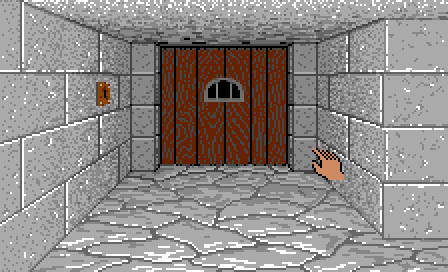
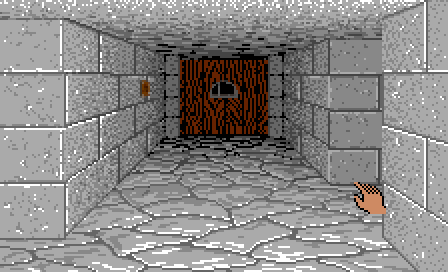
You can see that there is a missing bar in the last image.
That's because the ornate is scaled before we remove the pink pixels and this leads to inaccuracies in the
coordinates of these pixels.
But we'll find a way to fix these problems in the next part.
While writing this part, I also realized that in the original game a shadow was drawn under the object we are
holding. That makes it easier to see, especially for the keys. I'll add that in the next part too.