Downloads
Executable for the map editor - exactly the same as in part 12 (Windows 32bits)
Executable for the game (Windows 32bits)
Before you try to compile the code go to the "Projects" tab on the left menu, select the "Run" settings for your kit,
and set the "Working directory" to the path of "editor\data" for the editor or "game\data" for the game.
Loading the databases
The game needs to have the informations that are in "walls.xml" and "ornates.xml". So now it reads them in "walls.cpp".
The code is quite similar to the editor, except that we read the images names and the coordinates in "ornates.xml":
		//--------------------------------------------------------------------------------------------------------
		void    CWalls::readOrnatesDB()
		{
			QDomDocument doc;

			QFile f("databases/ornates.xml");
			f.open(QIODevice::ReadOnly);
			doc.setContent(&f);
			f.close();

			QDomElement root = doc.documentElement();
			QDomElement ornate = root.firstChild().toElement();

			while(!ornate.isNull())
			{
				if (ornate.tagName() == "ornate")
				{
					COrnateData   newOrnate;

					newOrnate.name = ornate.attribute("name");

					QDomElement ornateInfo = ornate.firstChild().toElement();

					while(!ornateInfo.isNull())
					{
						if (ornateInfo.tagName() == "image_front")
						{
							newOrnate.imageFront = QString("gfx/3DView/ornates/") + ornateInfo.text();
						}
						else if (ornateInfo.tagName() == "image_side")
						{
							newOrnate.imageSide = QString("gfx/3DView/ornates/") + ornateInfo.text();
						}
						else if (ornateInfo.tagName() == "pos_front")
						{
							newOrnate.posFront.x = ornateInfo.attribute("x").toInt();
							newOrnate.posFront.y = ornateInfo.attribute("y").toInt();
						}
						else if (ornateInfo.tagName() == "pos_side")
						{
							newOrnate.posSide.x = ornateInfo.attribute("x").toInt();
							newOrnate.posSide.y = ornateInfo.attribute("y").toInt();
						}

						ornateInfo = ornateInfo.nextSibling().toElement();
					}
					ornatesDatas.push_back(newOrnate);
				}
				ornate = ornate.nextSibling().toElement();
			}
		}

		//---------------------------------------------------------------------------------------------
		void    CWalls::readWallsDB()
		{
			QDomDocument doc;

			QFile f("databases/walls.xml");
			f.open(QIODevice::ReadOnly);
			doc.setContent(&f);
			f.close();

			QDomElement root = doc.documentElement();
			QDomElement wall = root.firstChild().toElement();

			while(!wall.isNull())
			{
				std::vector<CParamType> paramsTypesList;

				if (wall.tagName() == "wall")
				{
					CWallData   newWall;

					newWall.name = wall.attribute("name");

					QDomElement wallInfo = wall.firstChild().toElement();

					while(!wallInfo.isNull())
					{
						if (wallInfo.tagName() == "param")
						{
							QString paramType = wallInfo.attribute("type");

							if (paramType == "ornate")
							{
								CParamType  newParamType;
								newParamType.mType = eParamOrnate;
								newParamType.mName = wallInfo.text();
								paramsTypesList.push_back(newParamType);
							}
						}

						wallInfo = wallInfo.nextSibling().toElement();
					}
					wallsDatas.push_back(newWall);
					map.mWallsParams.push_back(paramsTypesList);
				}
				wall = wall.nextSibling().toElement();
			}
		}
Another walls table
The ornates positions will be computed relatively to the walls where they appear. So we need a table with the
walls positions and sizes, like the table we used to display the walls themselves:
		// table with the pos and size of each walls for the ornates
		struct SWallInfos
		{
			CVec2   pos;
			CVec2   size;
		};

		static const SWallInfos   gWallsInfos[WALL_TABLE_HEIGHT][WALL_TABLE_WIDTH][3] =
		{
			// Row 3 (farthest)
			{
				{{{0, 0}, {0, 0}}, {{0, 0}, {0, 0}},     {{0, 0}, {0, 0}}     }, // 03
				{{{0, 0}, {0, 0}}, {{ 8, 58}, {36, 48}}, {{0, 0}, {0, 0}}     }, // 13
				{{{0, 0}, {0, 0}}, {{78, 59}, {12, 48}}, {{134, 59}, {12, 48}}}, // 23
				{{{0, 0}, {0, 0}}, {{0, 0}, {0, 0}},     {{180, 58}, {36, 48}}}, // 33
				{{{0, 0}, {0, 0}}, {{0, 0}, {0, 0}},     {{0, 0}, {0, 0}}     }  // 43
			},

			// Row 2
			{
				{{{-77, 58}, {70, 48}}, {{0, 0}, {0, 0}},     {{0, 0}, {0, 0}}     }, // 02
				{{{  7, 58}, {70, 48}}, {{0, 0}, {0, 0}},     {{0, 0}, {0, 0}}     }, // 12
				{{{ 77, 58}, {70, 48}}, {{60, 52}, {18, 74}}, {{146, 52}, {18, 74}}}, // 22
				{{{146, 58}, {70, 48}}, {{0, 0}, {0, 0}},     {{0, 0}, {0, 0}}     }, // 32
				{{{216, 58}, {70, 48}}, {{0, 0}, {0, 0}},     {{0, 0}, {0, 0}}     }  // 42
			},

			// Row 1
			{
				{{{0, 0}, {0, 0}},       {{0, 0}, {0, 0}},      {{0, 0}, {0, 0}}      }, // 01
				{{{-46, 52}, {105, 74}}, {{0, 0}, {0, 0}},      {{0, 0}, {0, 0}}      }, // 11
				{{{ 59, 52}, {105, 74}}, {{33, 42}, {27, 111}}, {{164, 42}, {27, 111}}}, // 21
				{{{164, 52}, {105, 74}}, {{0, 0}, {0, 0}},      {{0, 0}, {0, 0}}      }, // 31
				{{{0, 0}, {0, 0}},       {{0, 0}, {0, 0}},      {{0, 0}, {0, 0}}      }  // 41
			},

			// Row 0 (nearest)
			{
				{{{0, 0}, {0, 0}},         {{0, 0}, {0, 0}}, {{0, 0}, {0, 0}}}, // 00
				{{{-127, 42}, {159, 111}}, {{0, 0}, {0, 0}}, {{0, 0}, {0, 0}}}, // 10
				{{{  32, 42}, {159, 111}}, {{0, 0}, {0, 0}}, {{0, 0}, {0, 0}}}, // 20
				{{{ 191, 42}, {159, 111}}, {{0, 0}, {0, 0}}, {{0, 0}, {0, 0}}}, // 30
				{{{0, 0}, {0, 0}},         {{0, 0}, {0, 0}}, {{0, 0}, {0, 0}}}  // 40
			}
		};
and their file names that we can use to get their size.
Well there are a few good reasons for that:
- First, in this table some cells are empty even if we have a graphic for this wall. Thats because in the game,
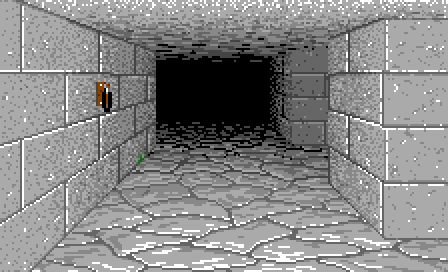
on some walls, the ornates are never drawn. For example, in the original game, the ornates never appeared on the
nearest left and right walls - Wall20_L and Wall20_R. We do not even have graphs for them, as the side ornates
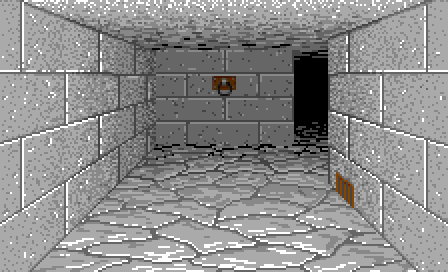
graphs are for the walls one level farther - Wall21_L and Wall21_R. - Then some walls do not appear completely. For some walls that are on the side of the "screen", like Wall30_F
or Wall31_F, the graph shows only a part of the wall. But we need to know the full size of the wall to place the
ornates properly. - Finally, I had to tweak these values a little bit to avoid ornates that were "moving" between the different
depth levels. Because the graphs of the original game were far from perfect. If you try to compute the width/height
ratio for the different levels of facing walls, you will see what I mean.
Setting up the variables
After a few tests to see if we have an ornate to draw, we set up the main variables we will need:
		CWalls::COrnateData& ornateData = walls.ornatesDatas[ornate];
		const SWallInfos*   ornateTabData = &gWallsInfos[tablePos.y][tablePos.x][tableSide];
		const SWallInfos*   ornate0 = NULL;
		QString ornateFileName;
		CVec2   ornatePos;
		bool    ornateFlip = false;

		switch(side)
		{
			case eWallSideUp:
				ornate0 = &gWallsInfos[3][2][tableSide];
				ornateFileName = ornateData.imageFront;
				ornatePos = ornateData.posFront;
			break;

			case eWallSideLeft:
				ornate0 = &gWallsInfos[2][2][1];
				ornateFileName = walls.ornatesDatas[ornate].imageSide;
				ornatePos = ornateData.posSide;
			break;

			case eWallSideRight:
				ornate0 = &gWallsInfos[2][2][1];
				ornateFileName = walls.ornatesDatas[ornate].imageSide;
				ornatePos = ornateData.posSide;
				ornateFlip = true;
			break;

			default:
				break;
		}
- ornateData points to the data from the "ornates.xml" file.
- ornateTabData is the cell of the table where we want to display our ornate.
- ornate0 is the cell of the reference wall - the one where the full sized ornate graphics would appear.
That corresponds to Wall20_F for a facing ornate or Wall20_L for a side one. The flipping for the right side
is handled later. - ornateFileName hold the file name of our ornate graphic.
- ornatePos will contain the final position on the screen.
- ornateFlip is a flag to tell if the graph will be flipped. It is only true if our ornate is on a right wall.
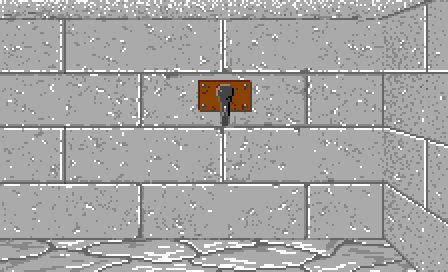
Calculating the position and scaling the image
		// calculate the position and scale factor and draw the ornate in a temporary image
		float   scale = (float)ornateTabData->size.y / 111.0f;
		QImage  ornateImage = fileCache.getImage(ornateFileName.toLocal8Bit().constData());
		QSize   ornateSize = ornateImage.size() * scale;
		ornatePos = (ornatePos - ornate0->pos);
		ornatePos.x = ornatePos.x * ornateTabData->size.x / ornate0->size.x;
		ornatePos.y = ornatePos.y * ornateTabData->size.y / ornate0->size.y;

		if (ornateFlip == true)
			ornatePos.x = ornateTabData->size.x - ornatePos.x - ornateSize.width();

		ornatePos += ornateTabData->pos;

		QImage  tempImage(ornateSize, QImage::Format_ARGB32);
		tempImage.fill(QColor(0, 0, 0, 0));
		graph2D.drawImageScaled(&tempImage, CVec2(), ornateImage, scale, ornateFlip);
Then, we get the position of the ornate relative to the reference wall. And we scale this position according to the ratio
between the sizes of the destination wall and the reference one, both on x and y.
We could have simply multiplied this position by the scale factor, but I found that was imprecise and the ornate was "moving"
on the wall.
Then follows a correction if the ornate is flipped, as we computed the position from the left of the wall, but once it is flipped
this becomes the position from the right.
Finally, we add to this position the position of the destination wall, to get the position of the ornate on screen.
In the last 3 lines, we draw the scaled ornate to a temporary image. I will explain why right now.
Darkening the image
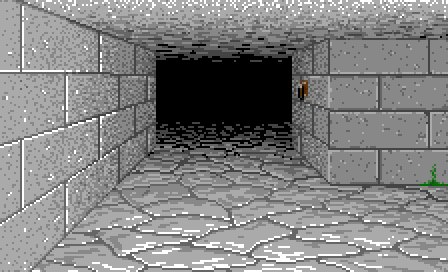
As I said in the last part, the ornates appears darker when they are farther from us.
		// darken the ornate based on it's distance
		static const float shadowLevels[] = {0.0f, 0.2f, 0.4f};
		float shadow;

		if (side == eWallSideUp)
			shadow = shadowLevels[WALL_TABLE_HEIGHT - 1 - tablePos.y];
		else
			shadow = shadowLevels[WALL_TABLE_HEIGHT - 2 - tablePos.y];

		QPainter painter(&tempImage);
		painter.setOpacity(shadow);
		painter.setCompositionMode(QPainter::CompositionMode_SourceAtop);
		painter.drawImage(QPoint(0, 0), *shadowImage);
		painter.setCompositionMode(QPainter::CompositionMode_SourceOver);
		painter.setOpacity(1.0f);
		painter.end();

		// draw the ornate on screen.
		graph2D.drawImage(image, ornatePos, tempImage, 0, false, QRect(0, 33, MAINVIEW_WIDTH, MAINVIEW_HEIGHT));
filled with black that is initialized before.
The composition mode of Qt is chosen to avoid darkening the transparent pixels of our ornate.
Finally, we draw our ornate on the screen. The last parameter is a clip rectangle to avoid drawing outside of the 3D view.
An ornate in the middle of the weapons interface would not be nice.
Better graphics
palette and the result was sometime strange.
We are not bound to use a palette, and our ornates are scaled using bi-linear filtering that leads to graphics that are closer
to the base unscaled image.
Look at the difference on the image below. On the left are screenshots from the original game running on an emulator, and on the
right we have screenshots of our game
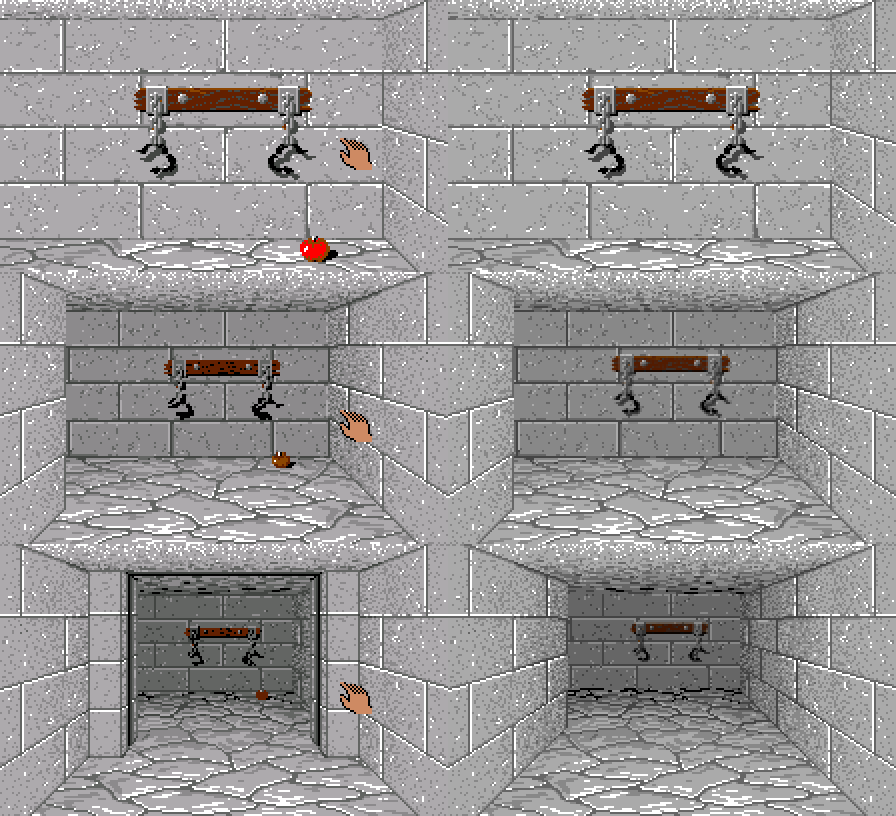
And here are some more examples: