The code in this article was written using Code::Blocks and SDL 2.
You can read
here a guide to install this software.
Although it is based on SDL, I don't use its functions directly. I have written a small library with a few basic
functions to ease the understanding and the portability to another language.
You can read more about this lib
here.
In this article I use the Targa functions from
here.
Here I will show you a small 2D effect to add relief to an image.
Firstly we will draw a spotlight.
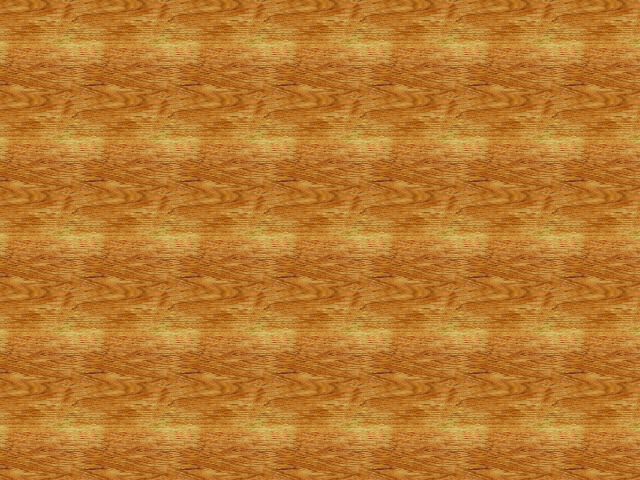
We will need 2 images, one for the background:
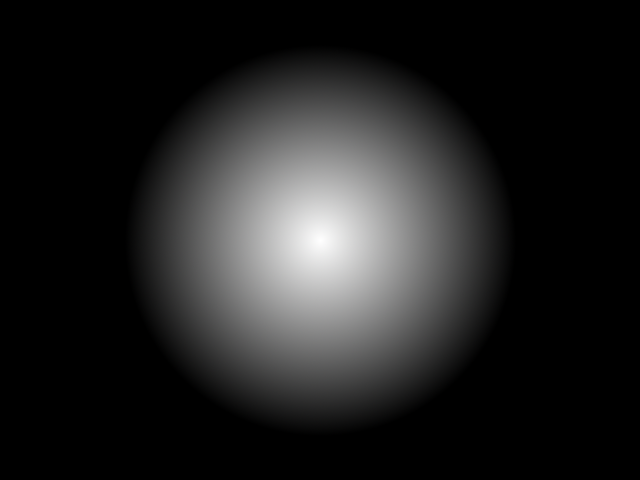
And one for the light.
In the code, we will begin by loading the images.
		#define SCREEN_WIDTH    640
		#define SCREEN_HEIGHT   480

		int main(int argc, char* argv[])
		{
			// init the window
			gfx.init("Bump", SCREEN_WIDTH, SCREEN_HEIGHT);
			gfx.init2D();
			gfx.clearScreen(Color(0, 0, 0, SDL_ALPHA_OPAQUE));
			int width, height;

			Color* background = tga.load("background.tga", &width, &height);
			Color* lightImage = tga.load("light.tga", &width, &height);
Then we loop over each pixel and we get the light.
It's a black and white image so we use only the red component.
			while (sys.isQuitRequested() == false)
			{
				// draw the image
				for (int y = 0; y < SCREEN_HEIGHT; ++y)
					for (int x = 0; x < SCREEN_WIDTH; ++x)
					{
						// compute the light intensity
						int light = lightImage[y * SCREEN_WIDTH + x].r;
We get the background color, we multiply it by the light, and we draw the pixel.
						// get the background color
						Color col = background[y * SCREEN_WIDTH + x];

						// modulate the color by the light intensity
						col.r = col.r * light / 255;
						col.g = col.g * light / 255;
						col.b = col.b * light / 255;

						gfx.setPixel(x, y, col);
					}

		Download source code
		Download executable for Windows
The rest of the program is classic. We handle the events, and end the main loop.
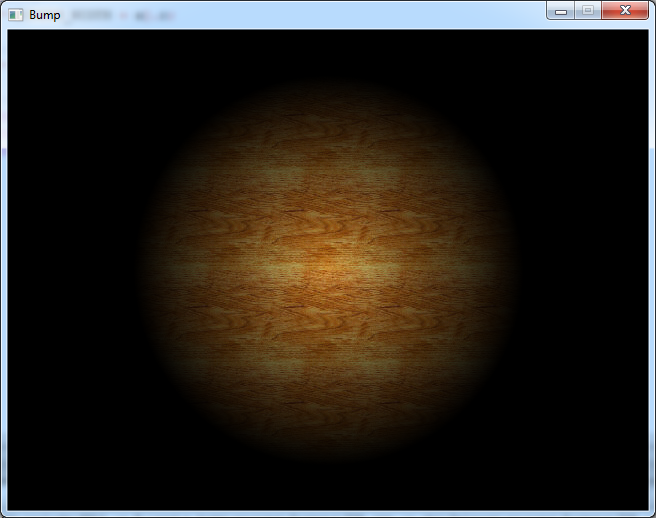
And this is what we get:
Now we will make the light move so that we will better see the relief effect.
I chose to use a
Lissajous curve to move it all around the screen.
So outside the main loop we will declare the light position and an angle.
		int lightPosX, lightPosY;
		float angle = 0.0f;
Inside the main loop we will compute the light position
		// move the light
		lightPosX = 160 * sin(angle);
		lightPosY = 120 * sin(2.0f * angle);
		angle += 0.02f;
And when we read the light pixel, we will add this position and check if we stay inside the image.
		int light = 0;
		int lightX = x + lightPosX;
		int lightY = y + lightPosY;

		if (lightX >= 0 && lightX < SCREEN_WIDTH &&
		    lightY >= 0 && lightY < SCREEN_HEIGHT)
		{
			light = lightImage[lightY * SCREEN_WIDTH + lightX].r;
		}

		Download source code
		Download executable for Windows
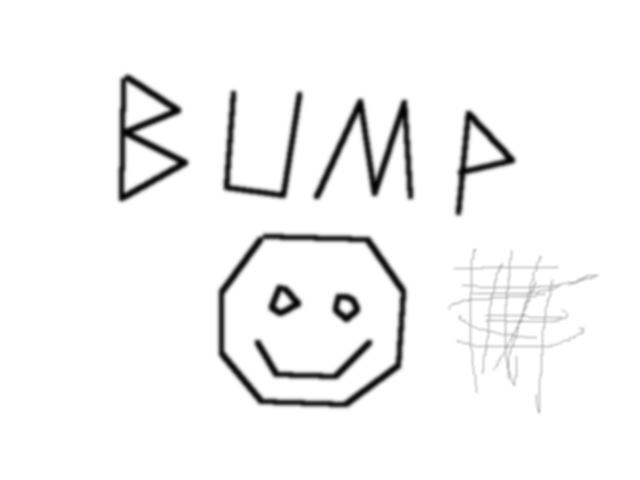
Now we will add another image that will be used to disturb the light position.
This image is a height map. The black is the highest point and the white is the lowest.
But we will see that we can invert theses values.
Of course we need to load this image at the beginning.
Color* bump = tga.load("bump.tga", &width, &height);
Now, for each point of this image we will need to get the "derivatives" along x and y.
So we will get the current pixel, one pixel to the right of it, and one pixel below.
The horizontal derivative will be "right pixel" - "current pixel".
And the vertical derivative will be "down pixel" - "current pixel".
		// compute the bump disturbance
		int deltaX = 0;
		int deltaY = 0;

		if (x < SCREEN_WIDTH - 1 && y < SCREEN_HEIGHT - 1)
		{
			int current = bump[ y      * SCREEN_WIDTH +  x     ].r;
			int right   = bump[ y      * SCREEN_WIDTH + (x + 1)].r;
			int down    = bump[(y + 1) * SCREEN_WIDTH +  x     ].r;

			deltaX = right - current;
			deltaY = down  - current;
		}
Then we add these deltas to the light position.
		int lightX = x + lightPosX + deltaX;
		int lightY = y + lightPosY + deltaY;

		Download source code
		Download executable for Windows
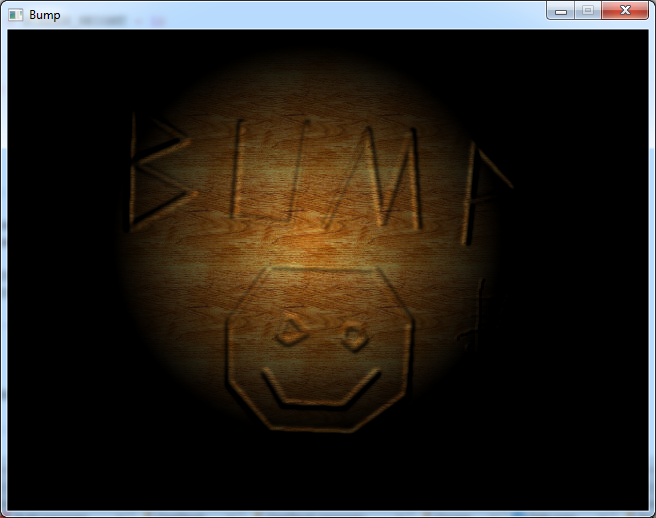
Now the image seems to come out of the wood.
Now the relief getting out of the wood is not very realistic.
It would be better if the effect was reversed, like if we engraved the picture in the wood.
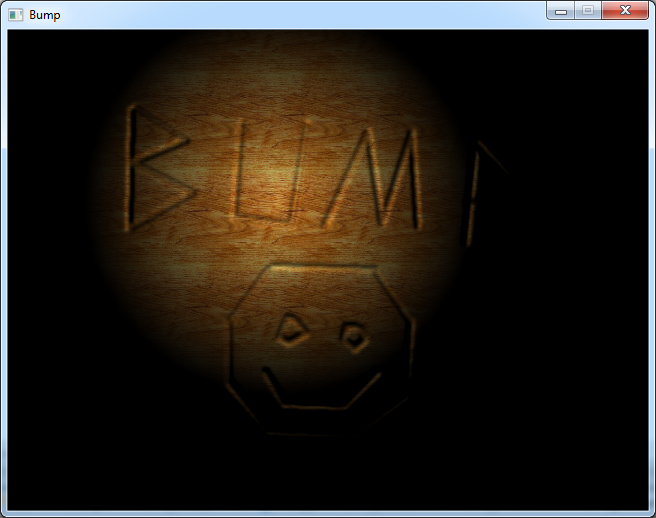
To achieve that we simply have to subtract the deltas instead of adding them to the light position.
		int lightX = x + lightPosX - deltaX;
		int lightY = y + lightPosY - deltaY;

		Download source code
		Download executable for Windows
And this is what it looks like:
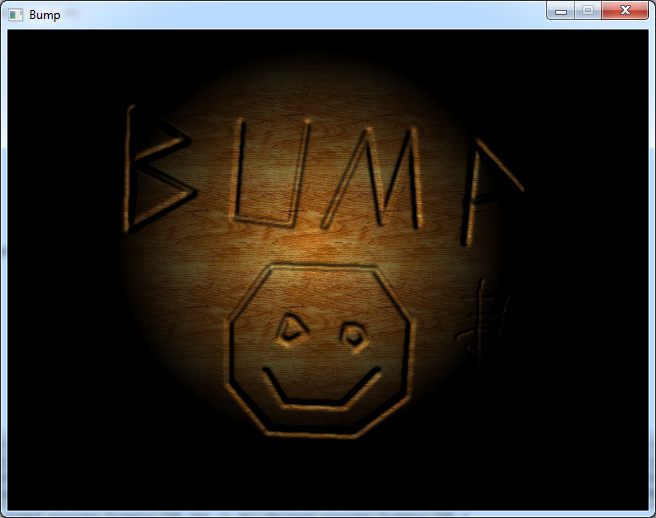
Now to get an even deeper effect, we can multiply the deltas by 2.
		int lightX = x + lightPosX - deltaX * 2;
		int lightY = y + lightPosY - deltaY * 2;

		Download source code
		Download executable for Windows
And now it looks really deep.